What is a miter saw?
Type of Miter saw Blades
| Image | Title | Price | Prime | Buy |
|---|---|---|---|---|
 Top
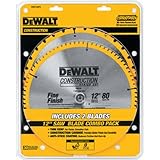
Top | DEWALT 12-Inch Miter Saw Blade, Crosscutting, Tungsten Carbide, 80-Tooth, 2-Pack (DW3128P5) | PrimeEligible | Buy Now | |
 Top
Top | Concord Blades WCB1200T120HP 12-Inch 120 Teeth TCT General Purpose Hard & Soft Wood Saw Blade | Prime | Buy Now | |
 Top
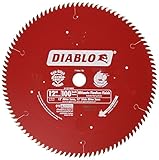
Top | Freud D12100X 100 Tooth Diablo Ultra Fine Circular Saw Blade for Wood and Wood Composites, 12-Inch | PrimeEligible | Buy Now | |
 Top
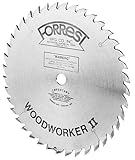
Top | Forrest WW12307125 Woodworker II 12-Inch 30 Tooth 1-Inch Arbor 1/8-Inch Kerf Circular Saw Blade | PrimeEligible | Buy Now | |
 Top
Top | TWIN-TOWN 12-Inch Saw Blade, 80 Teeth,General Purpose for Soft Wood, Hard Wood & Plywood, ATB Grind, 1-Inch Arbor | PrimeEligible | Buy Now | |
 Top
Top | Makita A-93681 10-Inch 80 Tooth Micro Polished Mitersaw Blade | PrimeEligible | Buy Now | |
 Top
Top | CRAFTSMAN 10-Inch Miter Saw Blade, Combo Pack (CMAS210CMB) | PrimeEligible | Buy Now |
Identify the primary information before buying a Miter Saw Blade
Before buying a saw blade you need to have a good idea about the blade. The buying guide is as important as a sword on the battlefield. If you don’t read the buying guide and don’t gather idea about the device, it would be quite difficult to select the perfect device for your task.
Before buying the device, you have to go through the following for your precise conception.
- Blade Design
- Blade Material
- Blade Size
- Blades Tooth
Blade Design
Your decision will vary by the kinds of slices that you will be making. Here, the plan is vital. The sum and kind of teeth can have a major effect when cutting various sorts of materials. For the most part, more teeth make for more exact and fine cuts.
Again, if you are working with thicker material, fewer teeth will work much better. The thickness is significant too. Standard edges are about ⅛ inches thick. For occupations where you are searching for a better completion, a meager kerf edge will be better as they are generally around 3/32 inches thick.
If your saw doesn't have a lot of force, at that point you should consider getting yourself a slender kerf edge for thicker cutting.
- Kerf Width
- Size & Thickness
Kerf Width
The Kerf indicates how much material you will lose by cutting. Edge with a flimsy kerf configuration gives you smooth and quick cutting. The more extensive the kerf more the material you will lose in making one cut in a piece of material. The standard kerf on a sharp edge is generally 1/8″.
It would help if you considered a flimsy kerf edge on the off chance that you will utilize the edge for tearing following the grain. A full kerf is 1/8″, though slim kerf is only 3/32.
The drawback of the flimsy kerf is less accuracy when contrasted with full kerf as it will avoid more when under a burden. So if you are utilizing a low force that is 110 V saw, utilize thin kerf in any case for 220V 3 HP power utilize full kerf cutting edge.
Size & Thickness
It is highly important to check the dimension and thickness of the blade. If you choose to reduce your working piece sharper and faster, go for the thinner blade.

If you prefer a blade that can reduce thru any metal, you have to select a thicker blade, and they additionally ultimate for a lengthy time.
The typical size of miter blades noticed is from 5- 12 inches, and every measurement is designed to operate a precise kind of saw.
It is higher to take a look at the files of your noticed to comprehend its proper size.
Blade Material
Though the manufacturers mostly use steel to make blades, you’ll choose unique sorts of blades made with unique sorts of materials. Blades made with metal are fairly plenty expensive; however, they are additionally durable.
Another frequent cloth used to make noticed blades is carbide; they are additionally long-lasting, however expensive.
You‘ll additionally discover noticed blades made of industrial diamond grit. You can use them without problems for masonry tilting and ceramic.
- Carbon Steel
- High-Speed Steel (HSS)
- Cobalt Steel Blades
- Carbide-Tipped Blades
Carbon Steel
Carbon steel blades are the most inexpensive and the most common type of blade. They are cheap and easy to manufacture. They are soft and flexible, so the users choose them for cutting through tight spaces. Moreover, because of their being soft and supple, you can easily bend them without breaking in the proper application.
They are excellent for cutting softer wood, particleboard, and plastics. Unfortunately, the teeth of a carbon steel blade are weak. So, the blades may break easily if you cut metal or stone. You can choose these blades for a quick job unless you think of longevity.
High-Speed Steel (HSS)
This type of steel is much stronger than ordinary carbon steel. They are more heat-resistant and durable than their carbon steel counterparts. Blades made from this material last up to five times longer than carbon steel.
The hardness of high-speed steel makes them less flexible, and so it may break while bent. They are incredibly suitable to cut hardwoods, aluminum, and non-ferrous metal without excessive wear, dulling, and tooth breakage.
Cobalt Steel Blades
Generally, cobalt is brought in sure excessive pace steels to enhance “hot hardness,” which is the capacity to hold hardness at excessive working temperatures. So, its addition to N690 and VG-10 is a bit of a thriller because these are now not excessive pace steels.
Carbide-Tipped Blades
A carbide-tipped blade is something like a saw blade. The manufacturers generally use steel to make the main body of the blade. The small tips of carbide are naturally brazed onto the body of the blades. A good carbide tip can sustain an edge ten to twenty times longer than a tool steel tip.
You can utilize Carbide saw blades for woodworkers and craftsmen for precision cuts for projects that require minimal to no tear-out, such as cabinet making or furniture building.
You can easily cut mild steel up to 3/8 in. thick by using a ferrous-metal-cutting blade. Though Carbide-tooth blades are more expensive, they last longer. A carbide-tipped blade lasts up to 100 times longer than steel in extreme conditions.
Blade Size
- The Bore
- The Diameter
The Bore
The motive of a bore is to connect the blade to the arbor of the round saw. You can additionally pick out a blade with a bore having a large diameter than the bore shaft or arbor of your saw. For this purpose, reducer rings or adapter rings are used.
The Diameter
When we speak about the diameter of a round noticed blade, we're speaking about the size of the line between the pointers of two of the blade's contrary teeth, passing via the core of the noticed blade.
This is viewed as the normal measurement of the blade. In inches, and all saws and noticed blades are rated on this size.
Blades Tooth
- Tooth Count
- Type of Grind
- Type of Grind
Tooth Count
Teeth per inch are the most crucial factor when it comes to reciprocating saws. The number of blade teeth per inch of saws primarily decides how fast they will cut. Reciprocating saw blades typically range from 3 - 24 TPI.
The number of teeth per inch determines the cutting speed, smoothness, and roughness of cutting. The TPI of reciprocating saw blades that range from 3-8 is best for making rough cuts in wood.
Pruning blades naturally possess a very low TPI. 8-14 TPI blades are more suitable for cutting wood and the occasional nail. The range of PTI from 14-18 is ideal for cutting metal, denser material, and finish cut in wood.
Blades with higher TPI always remove smaller amounts of material with each pass. Although they cut slower, they leave a much smoother edge. The PTI range from 18-24 TPI is still the best for cutting metal.
Type of Grind
A blade's grind is its cross-sectional form in a plane regular to the edge. If now not impossible, it would be difficult to put a "hollow grind" onto the proper reducing area of the blade itself, which is a very slim and small bevel. Grinding is the manner of developing grinds.
How to Sharpen a Miter Saw Blade by Hand
If the blade on your miter noticed has emerged as worn or stupid from everyday use, it will now not be successful in reducing with the precision and accuracy you want for your project.
The greater your miter noticed is used, the extra shortly the blade will put on down, sooner or later turning into blunt and much less effective.
If this has passed off to your miter saw, or if the edges of your miter noticed are establishing to show up rounded, you will want to sharpen it so that it can slice shortly and without difficulty as soon as again.
Thankfully, sharpening a miter noticed blade is now not a tedious or time-ingesting process. It solely takes about 15 minutes, after which you can return to your work and get the job done.
The 4 method of Sharpening your miter saw blades
- Remove the Blade from the Saw
- Mark the Teeth of the Blade
- File the First Tooth on the Blade
- Repeat Step Three with Each Tooth
1. Remove the Blade from the Saw
The first step is to take away the blade from the saw. The blade can't be sharpened while it is nonetheless connected to the saw, so you will desire to get rid of it earlier than you begin once you have eliminated the blade, vicinity it on the workbench, over the clamps.
2. Mark the Teeth of the Blade
Before you can commence sharpening, you will desire to mark one of the enamels on the blade using your crayon. This is so that you can maintain the tune of your beginning position. Without marking the blade, you run the danger of sharpening the equal tooth twice. While this will no longer damage the blade, it will waste time and be redundant and unnecessary.
3. File the First Tooth on the Blade
After you have prepped the blade for sharpening in the preceding two steps, you are prepared to file the blade's tooth. File them one after the other, focusing on one tooth at a time.
To do this, you will want to area your diamond gile at the backside of the first enamel's front side on the blade. Move the file upward and ahead in a clean action alongside the area of the tooth.
While you are doing this, the file's face has to be towards the flat section of the metal. Use a comparable sample to run the file in a clean action alongside the tooth's pinnacle flat section.
Be cautious now not to contact the enamel factor while you are sharpening the blade, resulting in an injury.
4. Repeat Step Three with Each Tooth
You will prefer to repeat the submitting process, described in the preceding step, for every one of the enamel till you arrive returned at the first one, marked by way of the crayon.
As you go alongside sharpening the teeth, be certain to keep away from touching factors or corners of the blade.
When you end with the first side, flip the blade over to the different side. To do this, reposition the blade on the claps. Then sharpen every tooth, following the equal system as you did with the first side.
When you arrive lower back at the first tooth, marked by way of the crayon, you will have completed sharpening the wide blade.